Unboxing and Initial Impressions
The DMX4707S arrives packaged with a set of essential components including a cage, trim ring, Bluetooth microphone, and extraction keys. The radio’s packaging emphasizes protection, sporting a screen protector ensuring a scratch-free installation.
Features and Functionality
The Kenwood DMX4707S boasts an array of features, making it an attractive option for tech-savvy users. Its user-friendly interface and setup menus make customization a breeze. The radio offers various sources including radio, SiriusXM, Bluetooth, USB, and aux input, providing a wide range of options for entertainment.
The menu structure allows for easy adjustments, providing users with the ability to personalize sound settings using the 13-band equalizer and sound effects like bass boost and loudness. Additionally, the time alignment, balance, and fader options contribute to achieving an optimized audio experience.
User Interface and Software
Navigating through the radio’s interface is intuitive, allowing users to rearrange icons and access settings effortlessly.As The DMX4707S review goes on i’ll tell you it also offers screen adjustment options, letting users customize color schemes and background images to suit their preferences.
Compatibility and Connectivity
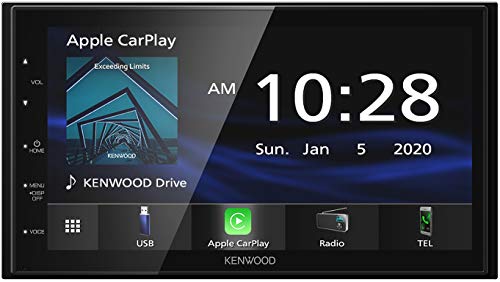
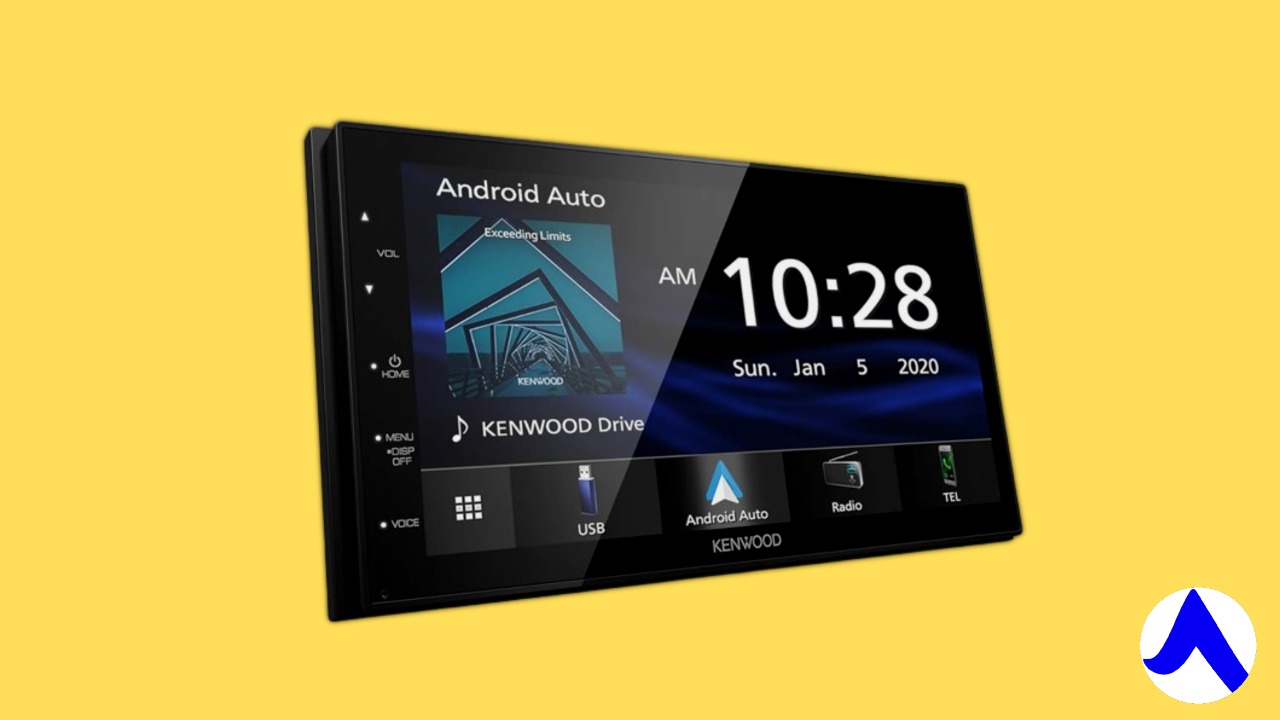
One notable aspect of the Kenwood DMX4707S is its compatibility with Android Auto and Apple CarPlay. This seamless integration allows for easy access to smartphone functionalities, enabling hands-free calls, navigation, and access to music apps.
Installing A Kenwood DMX-4707S Car Radio
Upgrading your car’s audio system can be an exciting venture, especially when the Kenwood DMX-4707S review is here. This step-by-step guide will walk you through the installation process, ensuring a seamless integration of this advanced car radio.
What You’ll Need
Before starting, gather the necessary tools and components:
- Kenwood DMX-4707S car radio
- K-492 dash kit
- USB DMA1 wiring harness
- BHA 7200 dash kit instructions
- Basic hand tools (screwdrivers, pliers)
- Plastic pry tool
Step 1: Preparation Park the car in a well-lit, safe area and disconnect the negative terminal of the car battery to prevent electrical mishaps. Gather the required tools and familiarize yourself with the installation instructions provided with the dash kit.
Step 2: Dashboard Disassembly Carefully disassemble the dashboard to access the existing radio. Utilize the plastic pry tool to remove the trim surrounding the radio, ensuring a gentle approach to avoid damage.
Step 3: Radio Removal Unscrew and remove the existing radio by disconnecting harnesses and antennas. Carefully detach all connections to ensure a smooth removal process.
Step 4: Dash Kit Preparation Refer to the instructions from the K-492 dash kit. Break off the tabs that won’t be used for the installation, ensuring a clean finish. Sand down any rough edges for a snug fit.
Step 5: Wiring the Kenwood DMX-4707S Connect the wiring harnesses according to color coding: match each wire on the harness to its corresponding wire on the radio. Verify the connections meticulously to avoid errors.
Step 6: USB Placement Decide on the optimal placement for the USB cable provided with the Kenwood radio. Consider accessibility and aesthetics while keeping serviceability in mind. Ensure a secure and convenient location for connectivity.
Step 7: Radio Mounting Mount the Kenwood DMX-4707S into the dash kit. Slide the radio into place, ensuring a proper fit and alignment. Secure it in position using the screws provided in the kit.
Step 8: Functional Testing Before reassembling the dashboard, perform a functional test. Reconnect the car battery’s negative terminal and power on the Kenwood radio. Test functionalities like Bluetooth, USB connectivity, and radio reception.
Step 9: Dashboard Reassembly Once functionality tests are successful, carefully reassemble the dashboard. Secure the trim pieces and ensure all components are back in their respective places.
Step 10: Final Checks Double-check all connections, buttons, and settings on the Kenwood DMX-4707S. Confirm proper functionality and integration with the car’s audio system.
Installing the Kenwood DMX-4707S car radio involves careful disassembly, wiring, and reassembly steps. Following this comprehensive guide ensures a successful integration of this innovative audio system, enhancing your driving experience with modern features and seamless smartphone connectivity
 .
.
Conclusion
In conclusion, the Kenwood DMX4707S proves to be a commendable addition to the market, especially for those seeking an affordable yet feature-rich car audio system. Its straightforward installation, versatile features, and compatibility with smartphone interfaces make it an attractive option for tech enthusiasts looking to upgrade their car’s entertainment system.